
How to Edit Your Photographs in Adobe Photoshop!

Adobe Photoshop is one of the best tools for professionally editing your photographs. However, gettings started can be daunting. With overwhelming amounts of features, knowing where to start can be difficult. Below is a step-by-step guide (with video assistance) to starting your editing journey. You will be on your way to creating images built for galleries and museums! If you don’t have Adobe Photoshop yet, you can sign up here! And if you are a student, you get a discount!
Opening your photograph into Adobe Photoshop
Starting your edits in Camera Raw
Opening as an Object in Adobe Photoshop
Cropping
Spotting layer (FOR FILM SCANS ONLY - If digital camera file, skip step)
Getting Started with Your Curve Layers
First Curve Layer: End Points
Second Curve Layer: Color Correction
Third Curve Layer: Contrast
By following these nine steps, you will better understand how to start the editing process. With a precise step-by-step guide, Photoshop will feel far less intimidating, and you can edit more images in less time. Now let’s walk through each of these nine steps together! You can find a more in-depth video tutorial on this process here (and at the end)!
Step 1: Opening your photograph into Adobe Photoshop
Here you will get started by opening up your raw files. These will be your .dng files off your SD card or your .tif film scans. Once you have selected the photo you wish to edit, right-click on the image and select ‘open with’ -> ‘Adobe Photoshop.’ The file will not immediately open in Photoshop but will start you off in Camera Raw.

Step 2: Starting your edits in Camera Raw
When opening your image, it will first open in Camera Raw. Here you will do all your basic and undestructive edits before editing in photoshop.

First, in the ‘BASICS’ tab, you will adjust the Temperature and Tint sliders to get your image as close to neutral as possible.

Then, in this same tab, you will lower your Highlights and open up your Shadows. If you wish, you can also use the Whites and Blacks slider to bring down the whitest tones in your image and lighten the darkest tones. Doing this ensures all the information from your file is available when editing in Adobe Photoshop. (This becomes important when dealing with Curve layers). Clipping means parts of your image are too bright or dark where there is no information to read (making pure white and black pixels). You will know if you are clipping details when the droppers in the histogram light up. When you do this step, your photograph will have low contrast and look flat.


After your basic edits, you will move to the DETAIL tab and remove any Sharpening. You want everything in this tab to say 0.

Next, you will move to the OPTICS tab and make sure “remove chromatic aberration” and “use profile corrections” are checked off. This step is more for digital files, but it doesn’t hurt to check them off for film scan files as well.


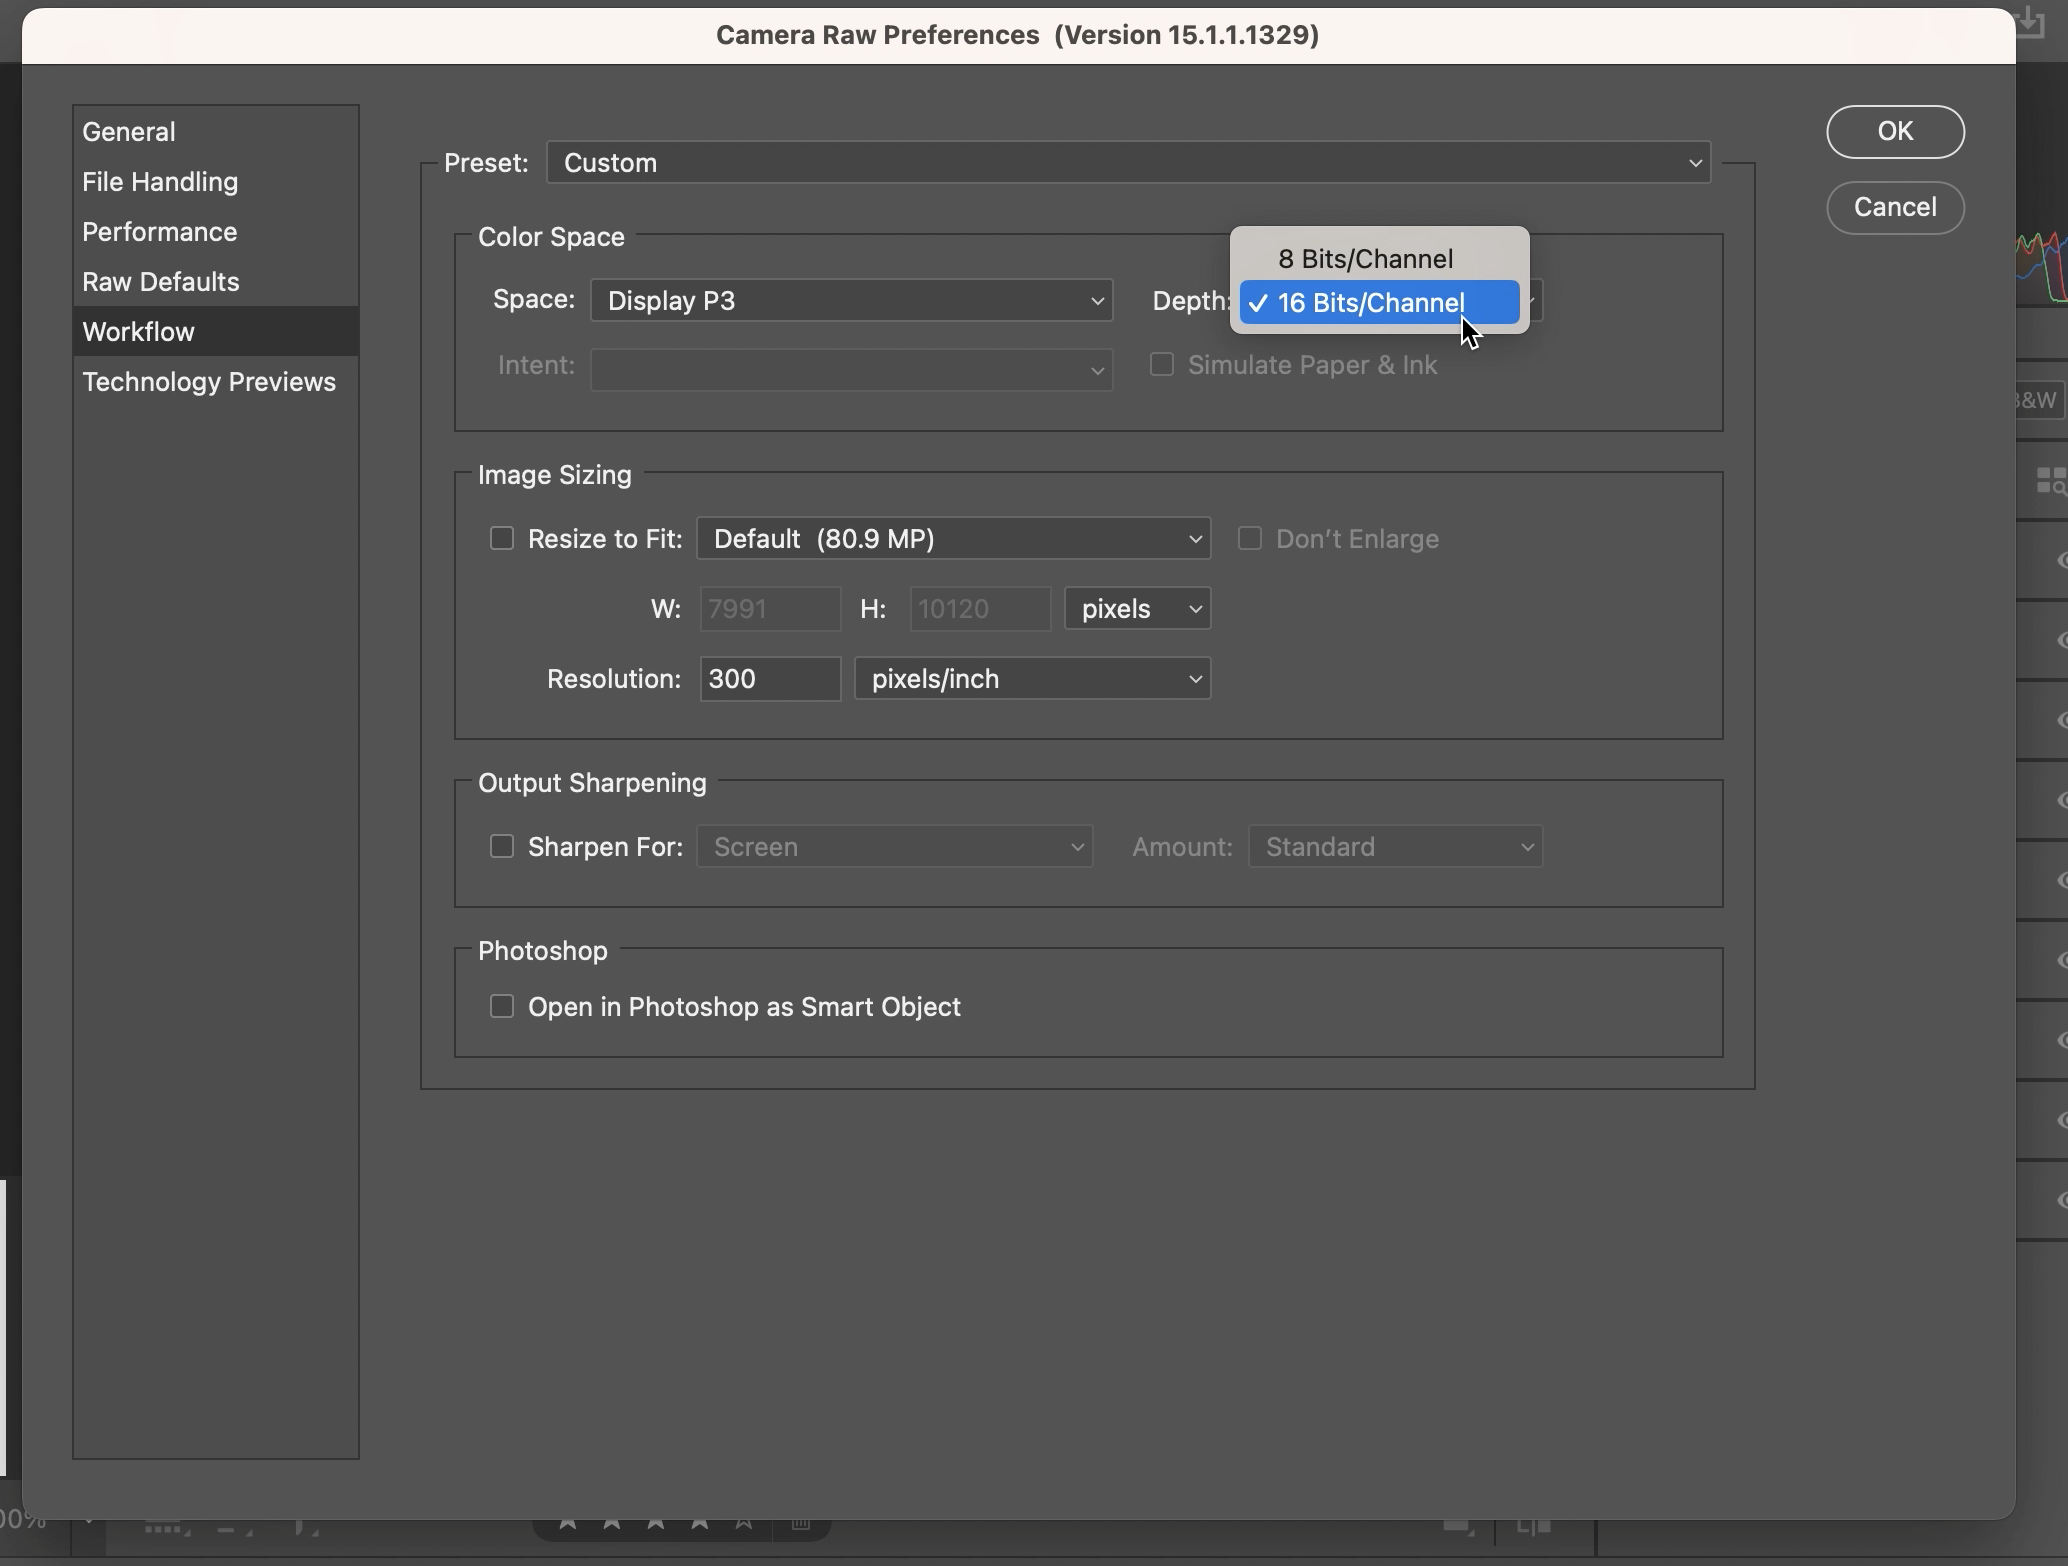
When finished, you will want to go to the bottom of the screen where it says ‘Display P3 - 16bit….’ Here you will check and make sure your image is 16bit and 300 dpi/ppi or more. If not, click this line and adjust under ‘Color Space’ -> ‘Depth’ to make 16bit. You can also change the dpi/ppi if it is not 300, but it is better if your image is already 300 dpi/ppi.

Step 3: Opening as an Object in Adobe Photoshop
Once finished editing in Camera Raw, you will open this image in Adobe Photoshop by pressing the down arrow on the ‘open’ button and selecting ‘open as object.’

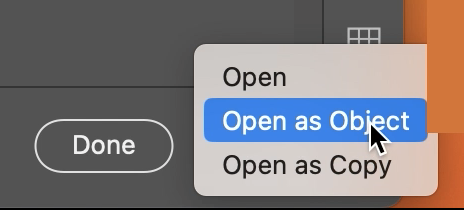
Opening as an object allows you to return to Camera Raw from Adobe Photoshop to make more edits. You can do this by clicking on the picture in the layer.

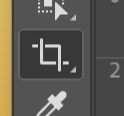
Step 4: Cropping
Once in Adobe Photoshop, you will crop your image down to its desired ratio. You do this by selecting this box on the tools panel on the left-hand side.
When cropping, do not select ‘delete cropped pixels.’ You do not want to delete the parts of the image outside the crop. If you ever want to go back and adjust your crop/ratio, this step is important.

Step 5: Spotting layer (FOR FILM SCANS ONLY - If digital file, skip step)
In this step, you will click the box with the plus sign [+] on the bottom of the layers panel in the right column. In this layer, you will use the spot healing brush to spot/edit out any dust, scratches, and marks on your film. To spot, zoom into your image to at least 100%. Spotting at 100% will allow you to see all the spots to edit out that would show up when printed large.
For Spot Healing Brush settings, I like to put my hardness between 20-25%. I also keep my brush thin and at an angle. You can do this by adjusting the Angle and Roundness.


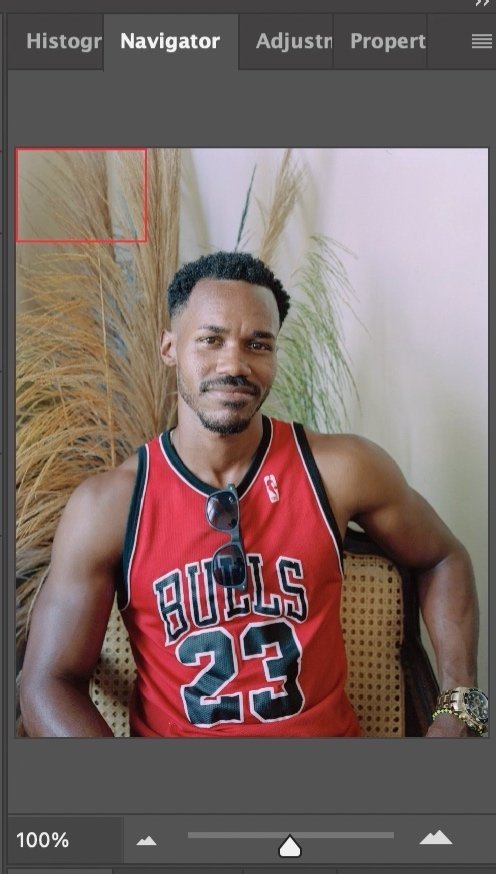
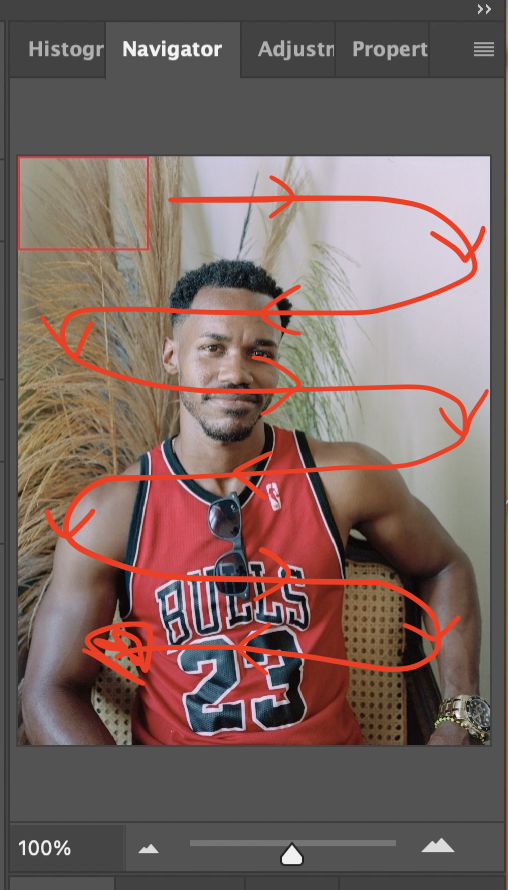
To get every mark, use the Navigator panel to know where you are on the image. Scroll to the top left corner of the image, and start spotting whatever is visible in that box/screen. Once finished, put your mouse on the top right corner and drag it over as you hold down the space bar until the mouse icon is on the left side. Continue to do this, going across and down the image until every part is complete.
Step 6: Getting Started with Your Curve Layers
Finally, we are at our curve layers. To get this started, you will add three curve layers by selecting the Adjustments button (half white/half black circle) at the bottom of the layers panel.

Select Curves and make three curve layers. From the bottom to the top, name the first layer ‘End Points,’ the second layer ‘Color Correction,’ and the third layer ‘Contrast.’ (Do this by double clicking the word ‘curves’)


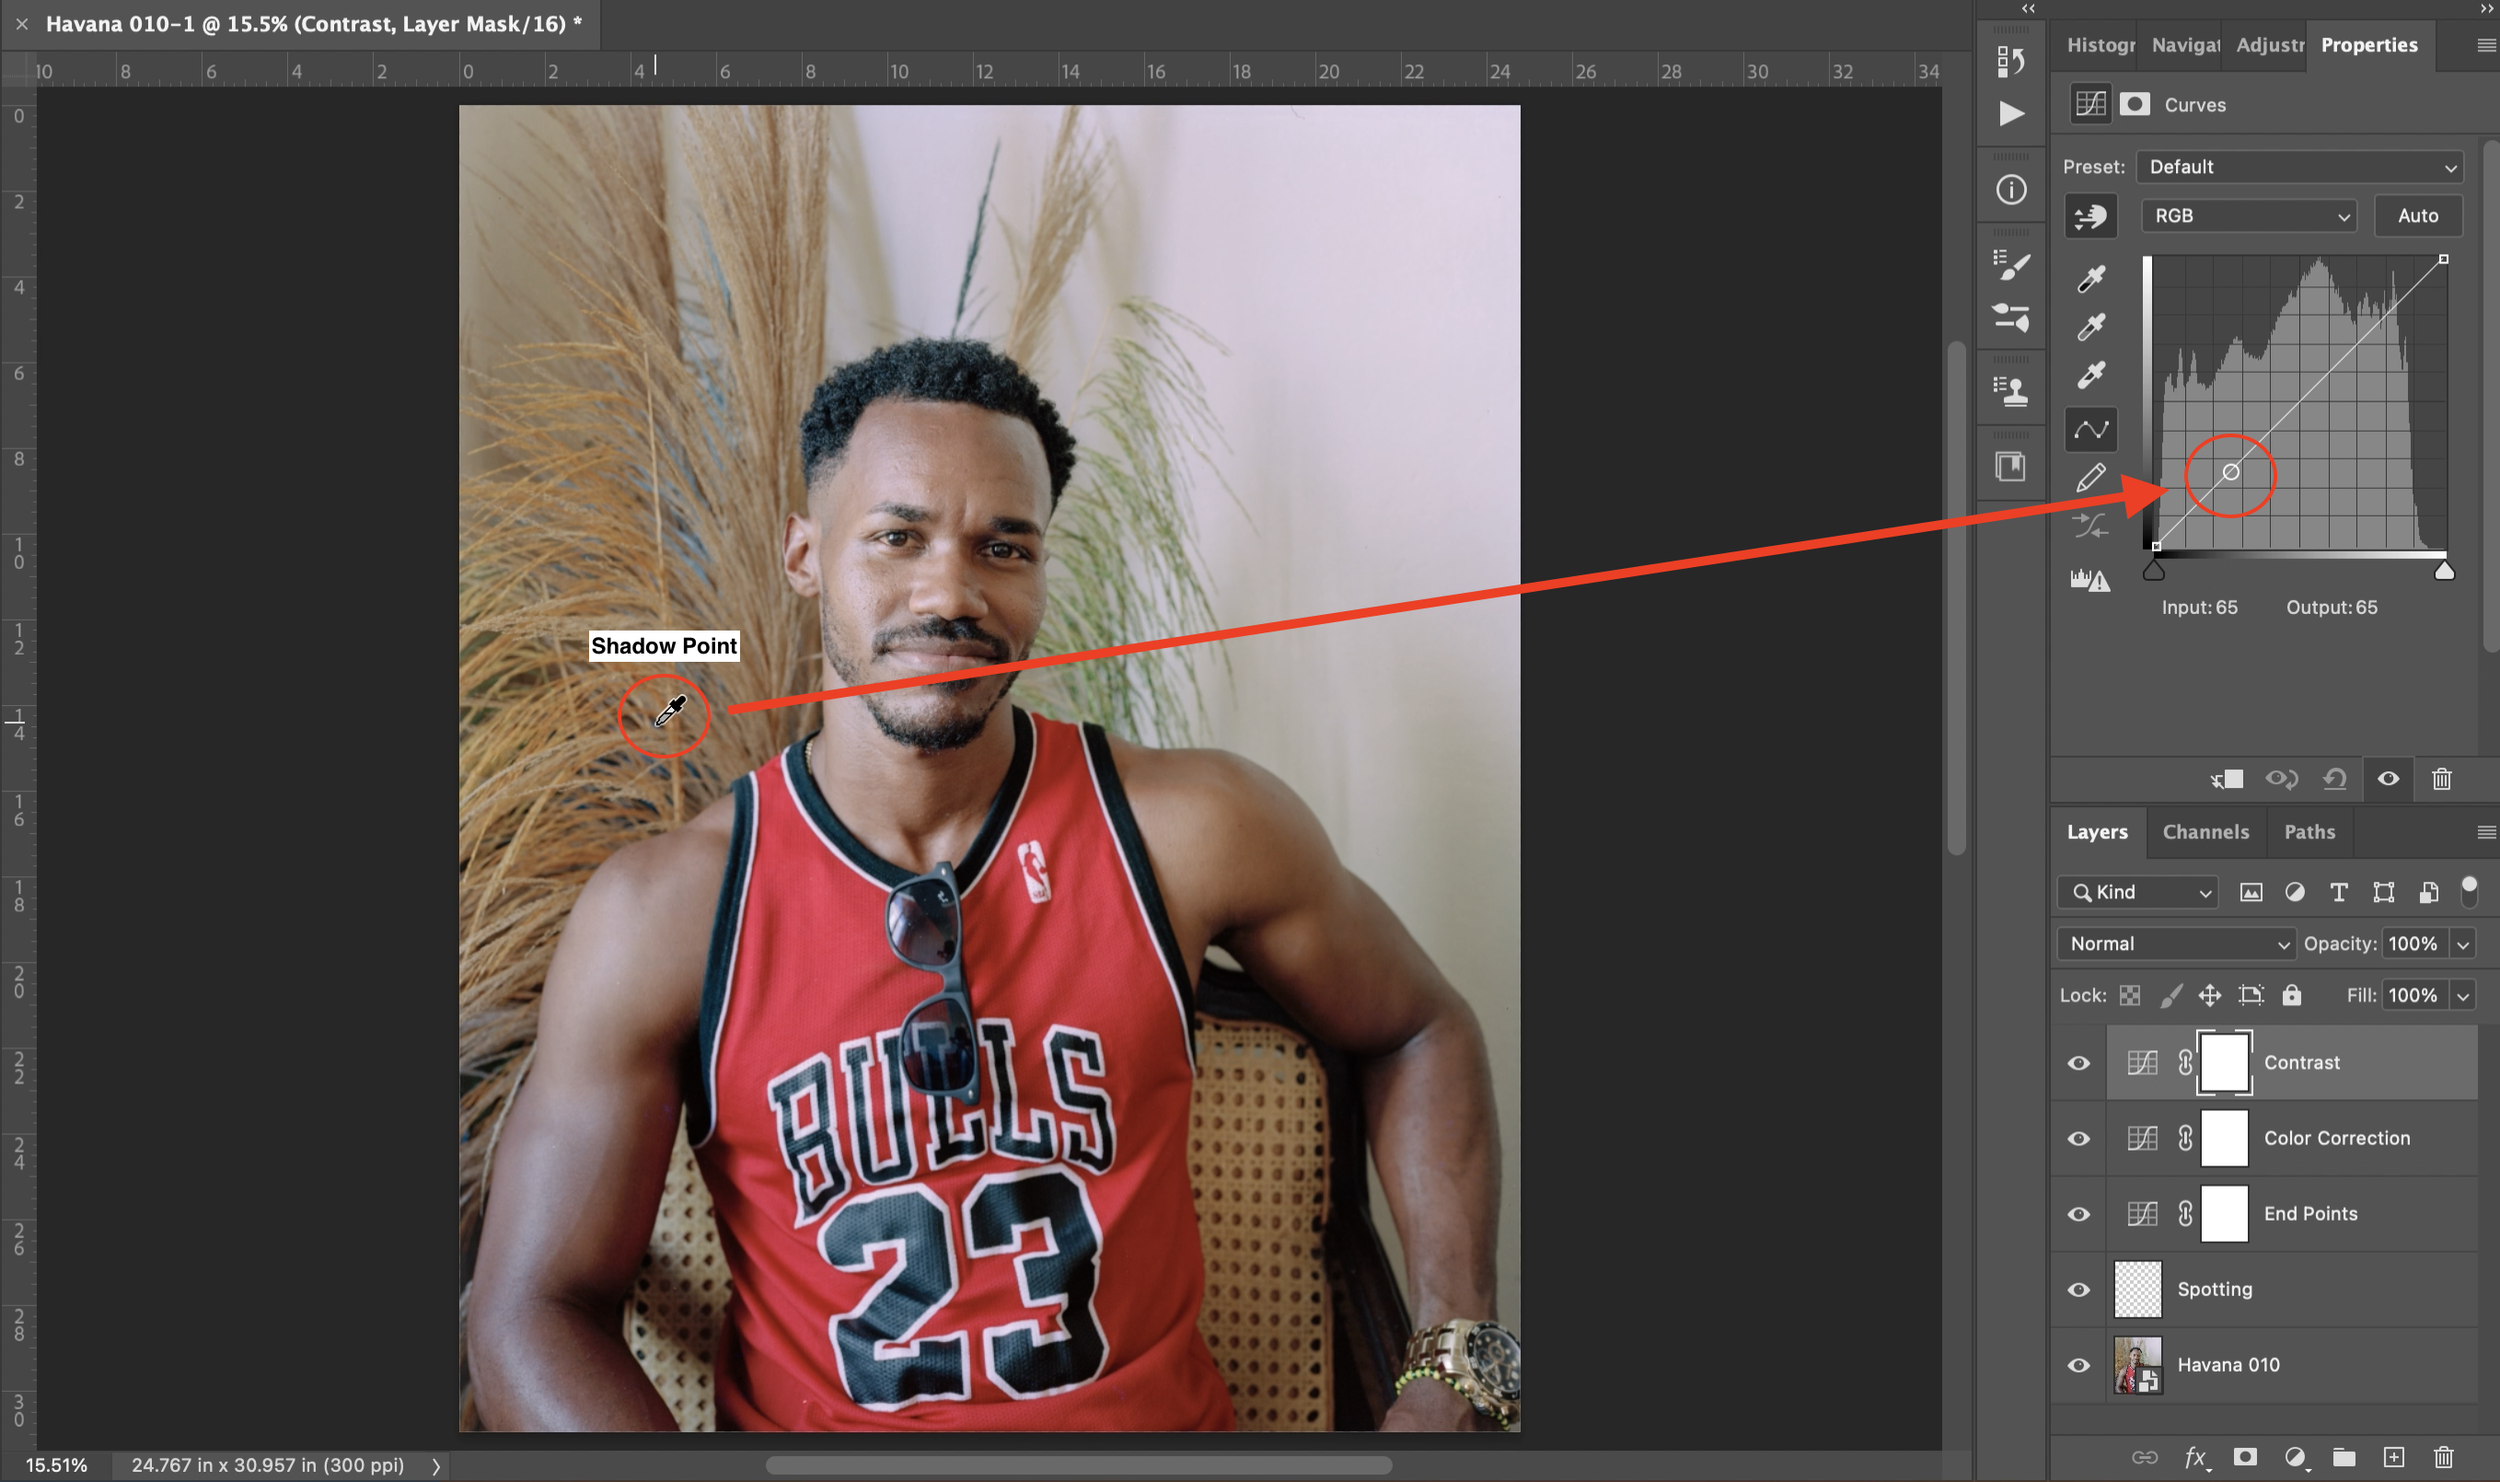
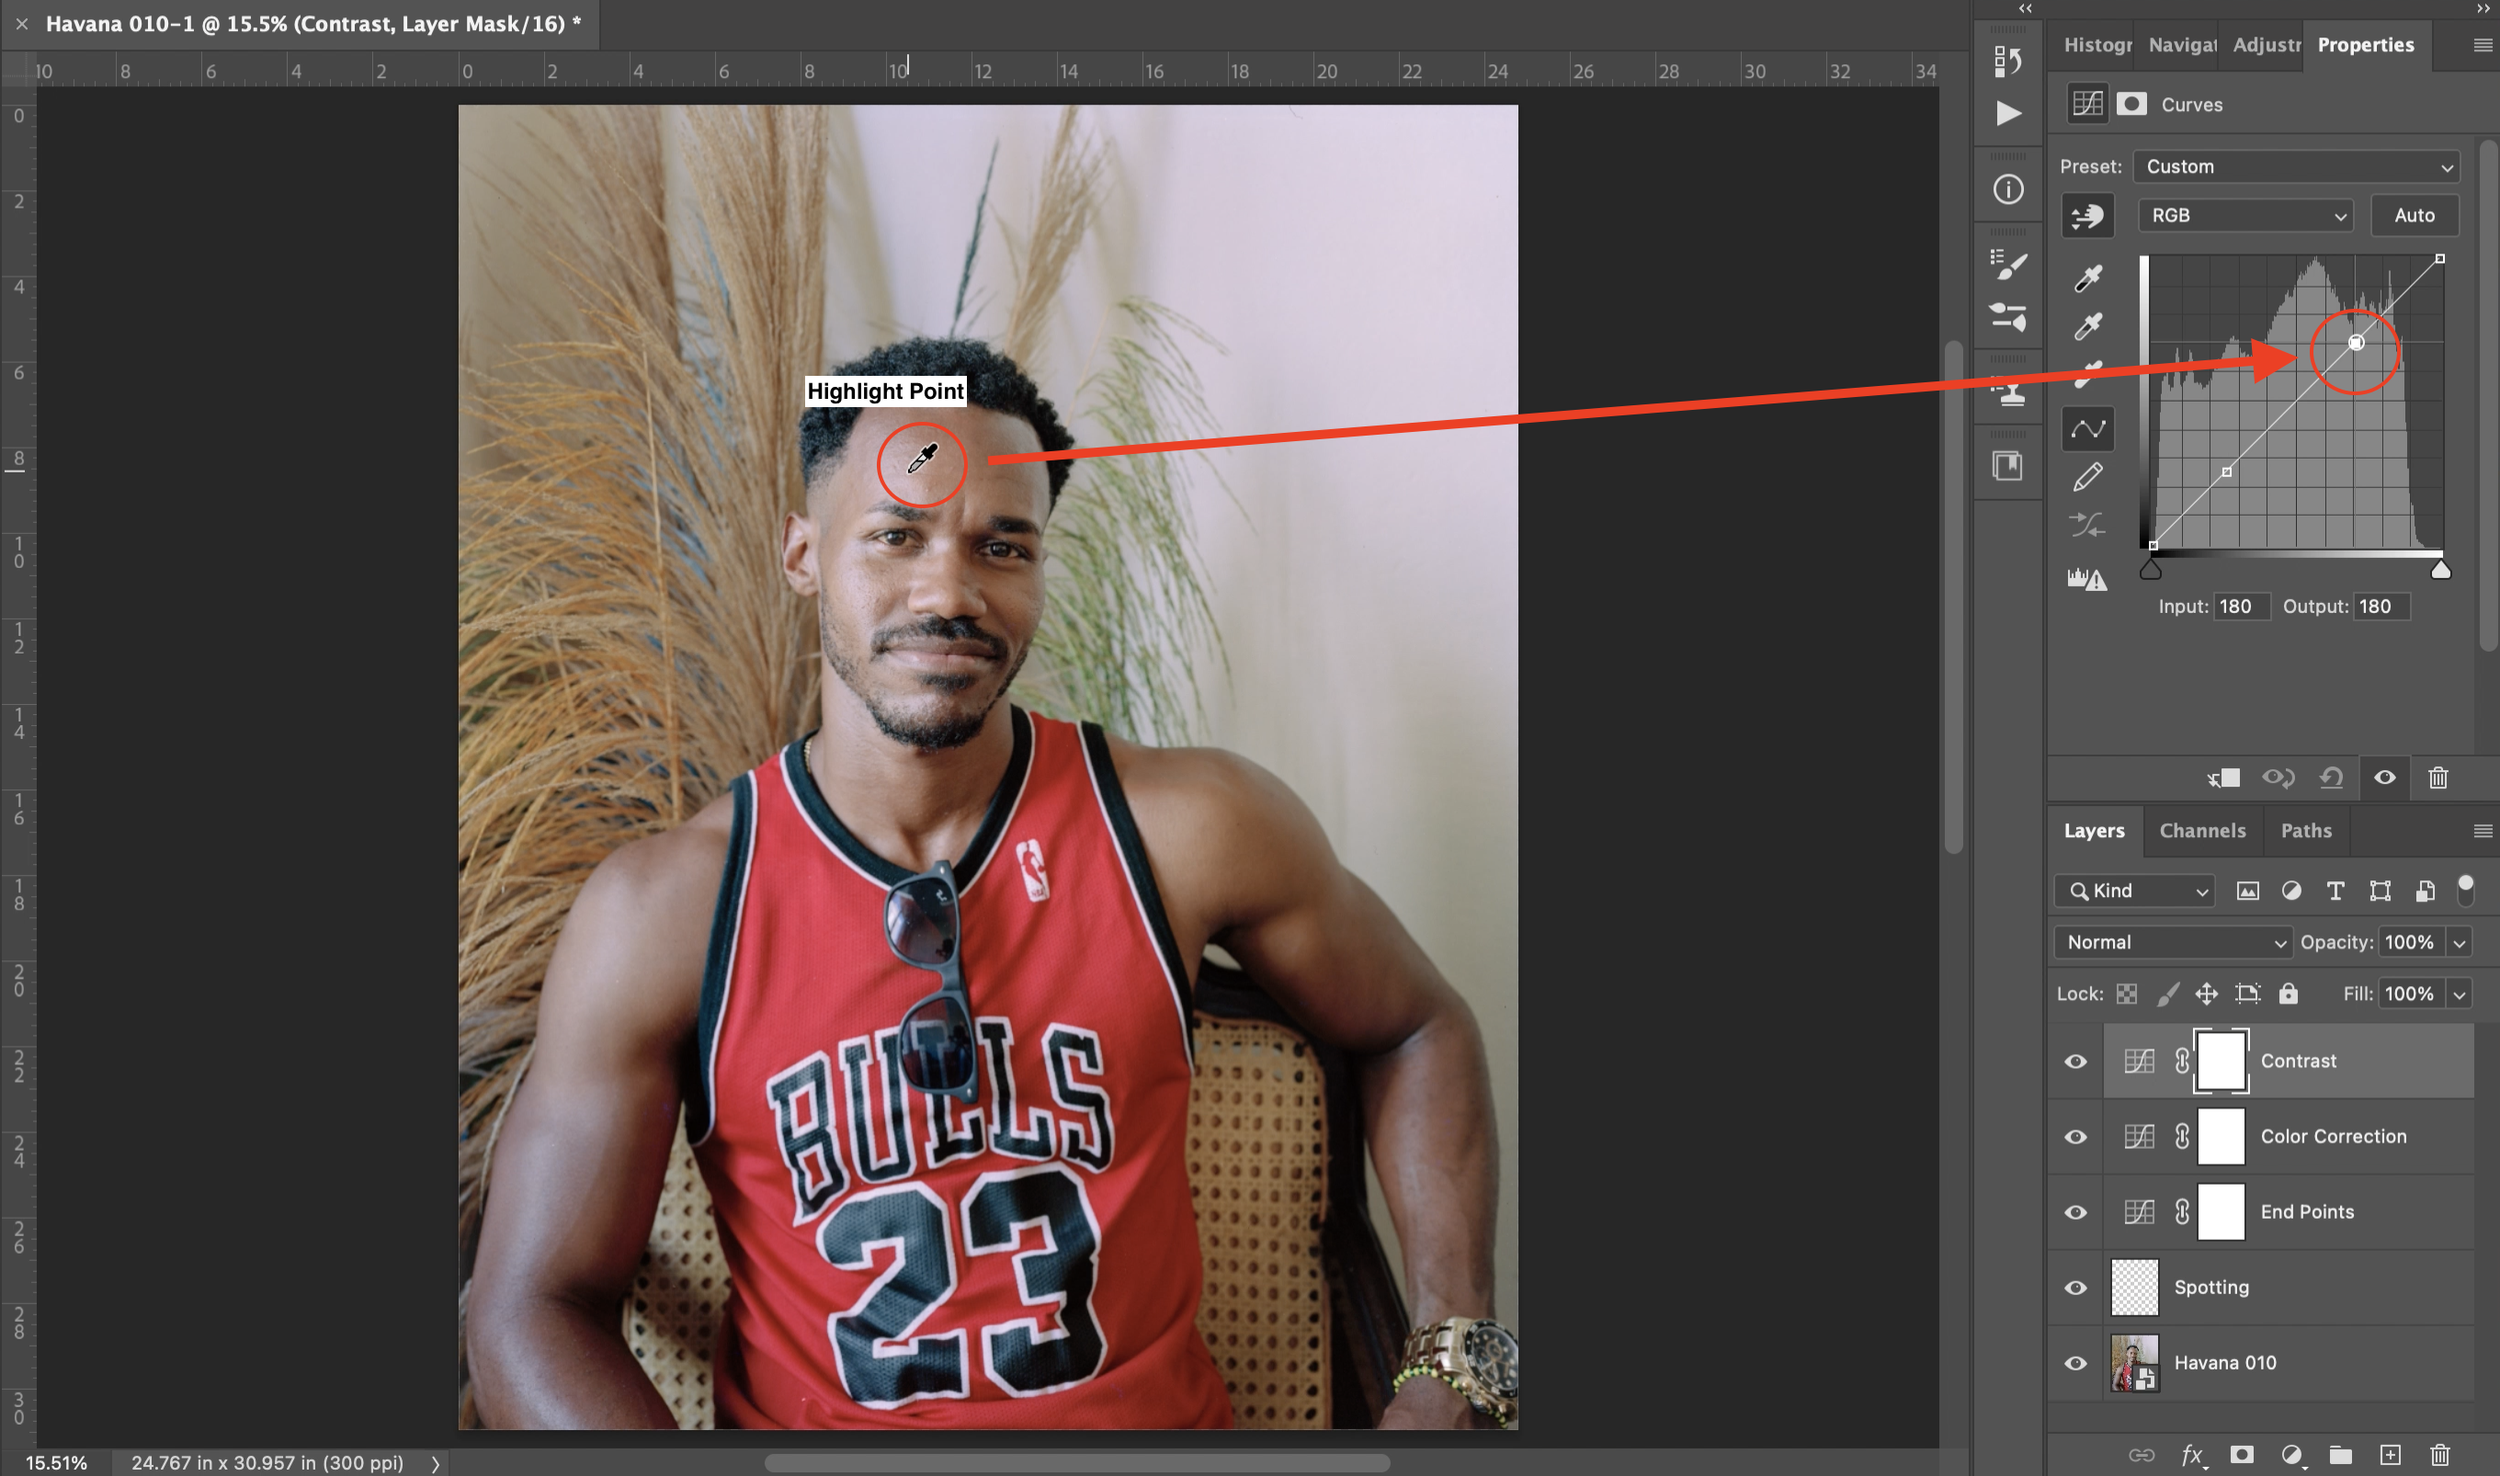
Step 7: First Curve Layer - End Points
On this first curve layer, you adjust the endpoints on your curve histogram for every color.


You do this by dragging in the end markers of each color layer in the curve. While dragging them in, you will hold down the OPTION key (for Macs) or the ALT key (for PCs/others).
When pulling in the shadows, the image will turn the color of the layer you are on. When pulling in the highlights, the image will be black. If you drag the endpoints too far, your image will appear.

For the End Points curve layer, you drag the endpoint right before a pixel appears on your image. You adjust your endpoints to ensure only necessary information is on the image.
You are basically cutting off the fluff. You will do this for every color.
Step 8: Second Curve Layer - Color Correction
In the Color Correction layer, you will begin to adjust the color of your image, making it neutral/similar to life. To do this, you will have to take a good look at your photograph and see what colors may be overpowering. This step can take a little more time to master, but soon you will be able to identify color casts immediately.
Once you recognize your color casts, adjust the color layers. In photography, three colors and their inverts make up images. Red and Cyan, Blue and Yellow, and Green and Magenta.
In the Red layer, you will move the point up to add Red and down to add Cyan.
In the Blue layer, you will move the point up to add Blue and down to add Yellow.
In the Green layer, you will move the point up to add Green and down to add Magenta.*
*It’s important to note that adding Magenta to an image is more effective than others. So a little goes a long way.
To select a point on the Histogram, use the pointer tool.

You will go into the color you want to add or subtract from, then select the point on the image where you see those colors. For example, in this image I’ve been showing you, I see some Cyan in his hair and Magenta in the highlights of his skin. So in the red color layer, I will use the pointer and select a spot on his hair. Pressing the up arrow on my keyboard, I will add some red to the image. Next, I will go to the Green layer and use the pointer to select a spot on his skin I see a cast of Magenta. Moving the point up, I will add green to the image.


Continue to add and subtract colors until your image appears neutral. You can tell you are adding or subtracting the right color if your image pops more from it. When there is a color cast, your image will appear flatter. So as you add the right colors, the photograph will come to life.
Note: Once you’ve selected your point on the Histogram, you will work off of that point. You will not add any additional points to that curve.
Step 9: Third Curve Layer - Contrast
After you have adjusted your color, you will move on to adding contrast to your image. Contrast is a simple step since you will only work in the RBG color layer, not the individual colors.
To add contrast, you will use the hand picker and select a shadow point and a highlight point.
Then, you will move the shadow point down and the highlight point up, creating an ‘S’ curve. Easy as that! Now your image has more contrast!


Note: When contrast is added to an image, it can adjust the colors slightly. So you may have to go into your Color Corrections layer to make minor adjustments.
CONGRATS! You just completed your first edit on your raw image!

You now have the basic skills to edit your photograhs like a professional artist. With more practice you will breaze through all these steps!
And you’re just getting started! There are so many more steps you can take to edit your image and make it stand out. I will be sharing more Photoshop tips soon so make sure you subscribe to my Newsletter and my Youtube Channel! If you have any questions about what I shared today or a question about something in particular please share in the comments!
This blog is fully written and run by photographer Caterina Maina. If you like what you read, please leave a comment, like, and/or share it on your social media!
And if you have any questions, suggestions on topics, or an interesting exhibition Caterina should check out please feel free to leave them in the comments or email her at caterinamainaphotography@gmail.com!
Some of the links in this article will direct users to our affiliates at Blick, Amazon, Adobe Creative Cloud, and Red River Catalog. By purchasing anything using these links, Caterina may receive a small commission at no additional charge to you. This helps her produce content and continue her creative endeavors. Many thanks for your support. She will never share or promote something she does not 100% recommend. And if you want to support in any other way you can click on the button below! <3

Tip: when commenting you do not need to fill out all the info and can post anonymously